Showing posts with label workshop. Show all posts

Thursday, March 28, 2013

Tea Bags Surprise Present


You will need: Tea bags, paper squares (I used 10.5 x 10.5 cm), nice messages or wishes, some glue and some decorations.


Write something nice for this special person receiving this special gift. He or she will be happy and smile every time while drinking tea :-)


I used a lot of different kinds of tea - so it will be a nice surprise to be existed about :-)


Put the opposite corners of the paper square together, then from the other two sides


Use some (just a bit!) glue to fix theemvelope


You can put some decorating stuff over 


 Done!


Enjoy your tea :-)


Friday, March 1, 2013

Scarf, knitting

Nice scaft, quickly made! 300g threads and some evenings time :-)


Thursday, December 6, 2012

Swan Sonobe Kusudama

  • Author: Meenakshi Mukerji
  • Parts: 3 (13 x 13 cm)
  • Tools: paper only
  • Size: 5 cm
  • Workshop
f


Friday, November 30, 2012

Sonobe Variation

  • Author: M. Mukhopadhyay
  • Parts: 3 (13 x 13 cm)
  • Tools: paper only
  • Size: 5 cm
  • Workshop


Sunday, November 25, 2012

Sonobe Ciclone

  • Author: Tadashi Mori
  • Parts: 3 (13 x 13 cm)
  • Tools: paper only
  • Size: 5 cm
  • Workshop


Tuesday, November 13, 2012

Knitting, Scarf

Tools: 200gr thick threads (ca.160m)

It was really fun to make this scarf! Easy, quickly and so nice!


Sunday, March 4, 2012

Knitting

It was really fun to make this scafr. I am not experienced in knitting, but this one was a really easy thing to do!

Workshop

Additionally to the steps, provided in the workshop, I made an additional stitch after every "long" one.

Wednesday, December 28, 2011

3d origami star

  • Units: 6 (the more you use the more 3d the star will be, but you can also use less than 6! I took papers 5x5 cm)
  • Tools: paper


0. Take the amount of squares you need. My favourite is this star out of 6 ones, but 5 corners star I like too:

1. put the corners together, coloured side out

2. unfold and repeat with the other side:

3. unfold and turn around:

4. put the sides together, the white side out:

5. unfold and repeat with the other side:

6. so it will look like once you are done:

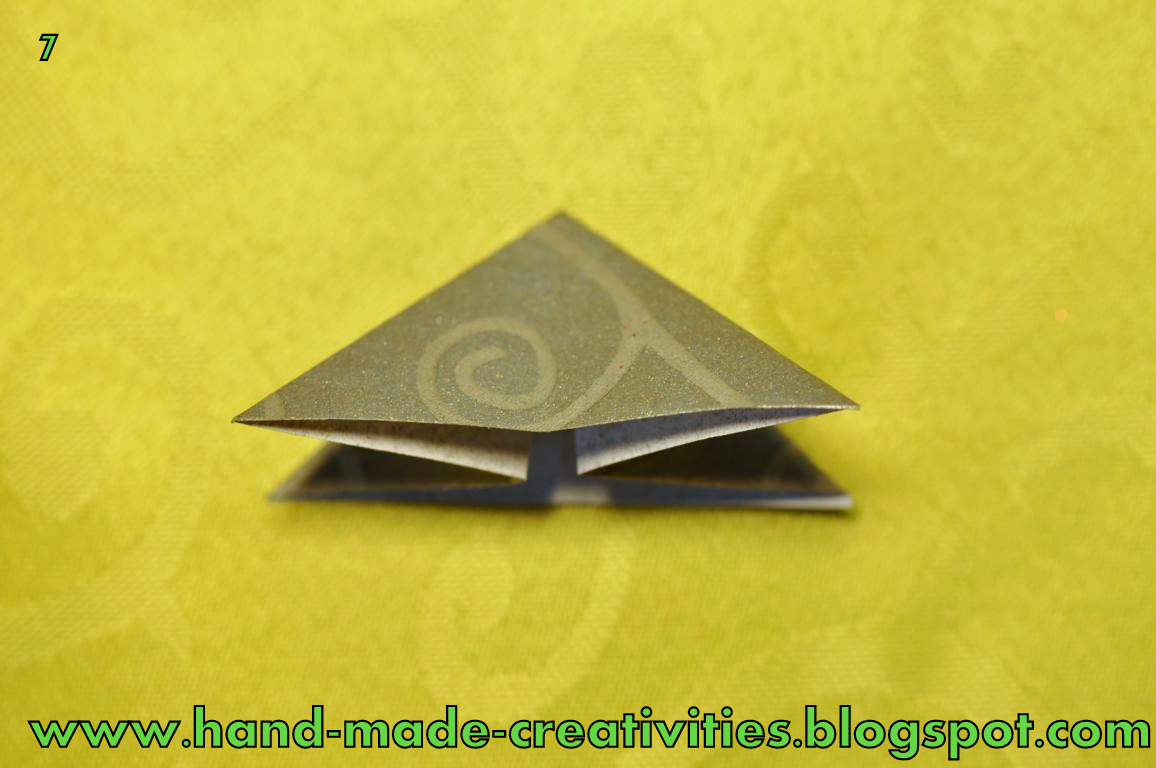
7. fold the lines together:

8. Put both right corners to the top one:

10. and repeat with the other side, so the finished modul will look like:


10. Make 6 of them:

11a. put the corners of one (red) into the pockets of the other (silver):

11c. till the end, so it will look like:

12a. open the "pocket" from the top and make your moduls look like 3d, it will also will fix them, so you dont need any glue:


12b. so the first two modules will look from the top, when you press them together:


13a. repeat with the next one:


13b. do not forget to open the star from outside to make it 3d:

14. put the last module into the first one:

15. Juhuuu, done, congratulations!

Related Posts with Thumbnails